
A Great tutorial on how to create a beautiful rustic Christmas Tree made of barn wood. Make sure to check out the original source for extra tips on how to make the most precise, (and safe!), cuts to create a spectacular festive piece.
![]()
Materials
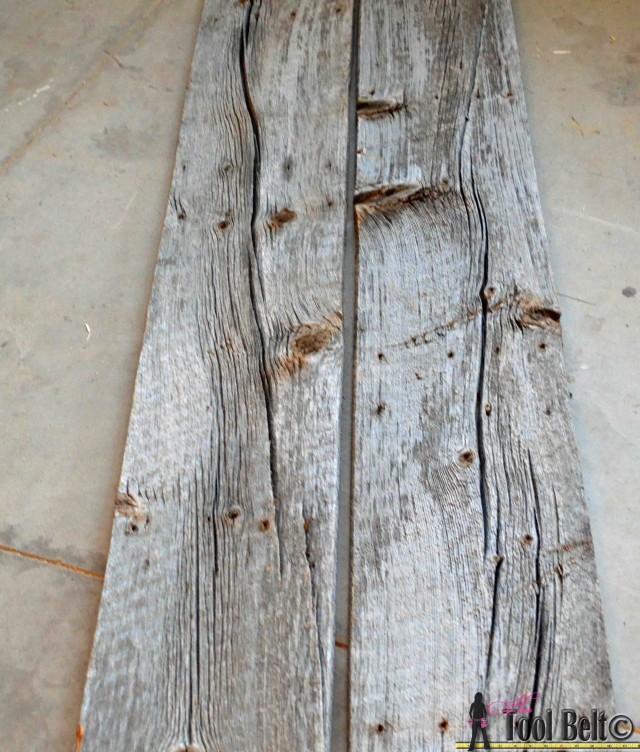
- barn wood or pallet slats
- 1 x 4 x 8′ (actual 3/4″ x 3 1/2″)
- wood glue
- brad nails*, length depends on the thickness of your wood.
- 2″ brad nails
How to make it
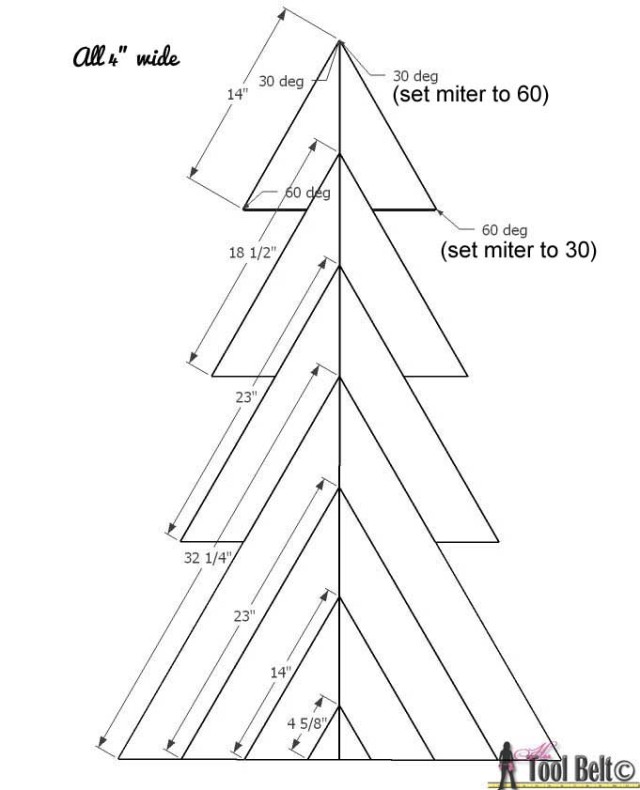
Step 1: I ripped the boards into 4″ boards and 3″ boards, if you use pallet slats, you probably won’t have to rip the boards.
Step 2: Now it’s time to make the miter cuts. For the 1st layer of wood, the pieces are all 4″ wide. Make 2 of each cut.
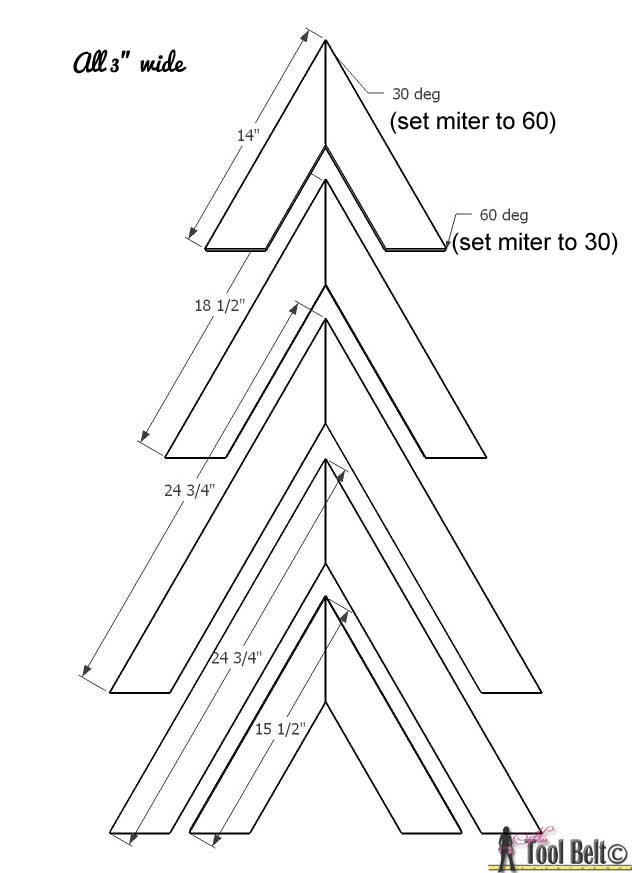
Step 3: Next, use the 3″ wide boards and cut the pieces for the second layer.
Step 4: Cut a 1″ x 4″ furring strip, or any other scrap wood to about 50″. I made a point at the top to match the angles of the tree. Apply plenty of wood glue.
Step 5: Place the 1st layer (4″ boards) onto the furring strip meeting at the center, nail in place with 1 1/4″ brad nails or screws.
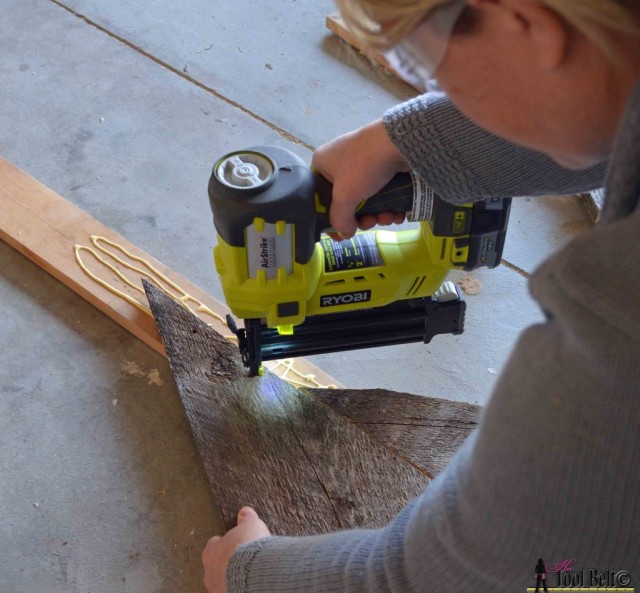
Step 6: Once you’re finished with the first layer, glue and nail the second layer boards into place using 2″ nails. Allow the glue to dry