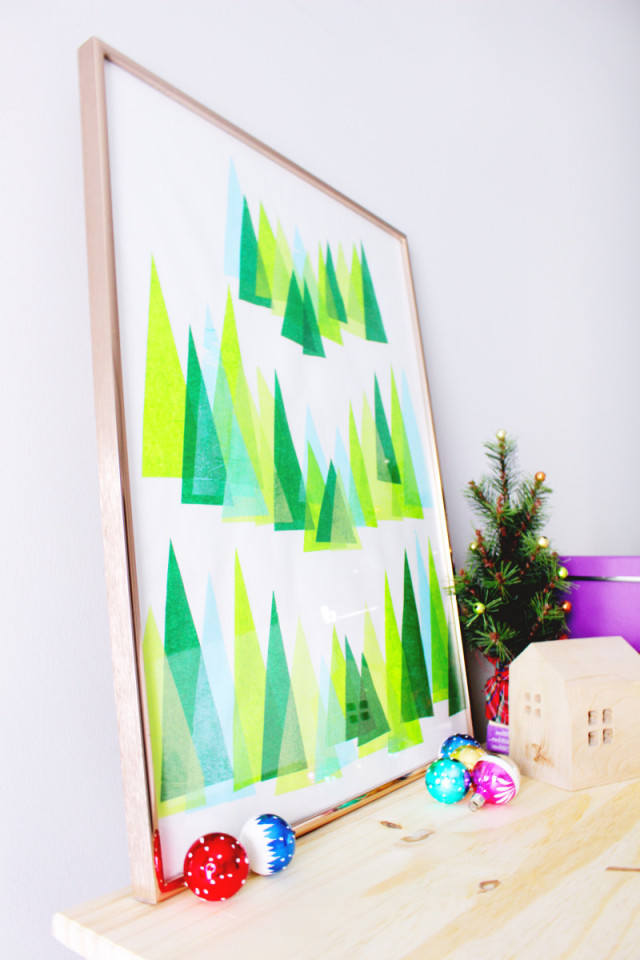
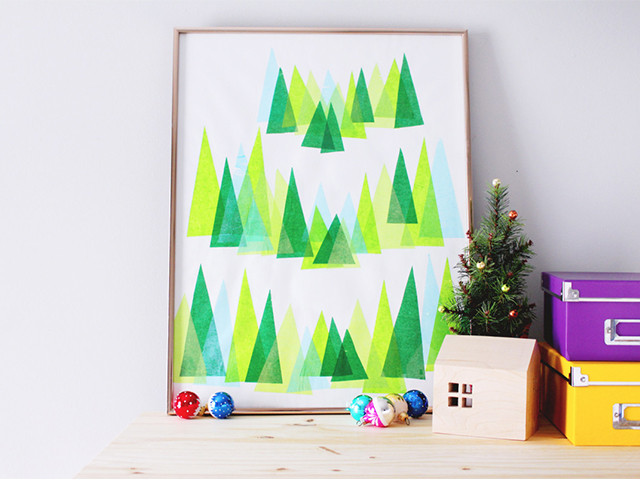
One of my favorite things about the holidays is filling our home with the smell of a fresh, green pine tree! This year we’ll remember to actually water our Christmas tree so the pine needles don’t start dropping like flies (duh how did we miss that!). While we haven’t picked up our tree yet, I have the next best thing – DIY Winter Pine Tree Art to add to your festive decor! I’m so excited to share this DIY because 1. I think it looks great, and 2. it’s started to snow here so hello winter!
![]()
Materials
- Tissue paper, various colors
- White glue
- Water and container
- Thick watercolor paper (the thicker, the better!)
- Photo frame (I found mine at Goodwill)
- X-acto knife
- Ruler
- Cutting Mat
How to make it
Step 1: Begin by using a scrap piece of paper to cut out a tree shape that you like. Create a few different sizes and shapes for variation.
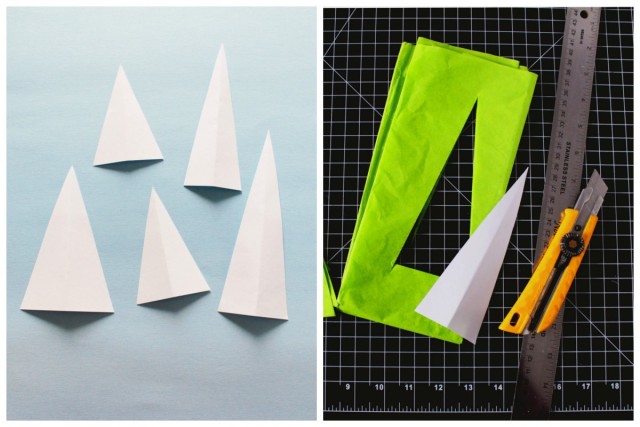
Step 2: Fold a sheet of tissue wrapping paper into a few layers and lay on your cutting mat. Lay your stencil on top and use your sharp x-acto knife and a ruler to cut out tree shapes. If your x-acto knife has a sharp blade, this will be fast and easy. Pro-tip: Don’t put a lot of pressure on the knife, just drag lightly to avoid tearing the delicate tissue paper.
Step 3: Continue cutting tree shapes out of a few different colored tissue wrapping paper.
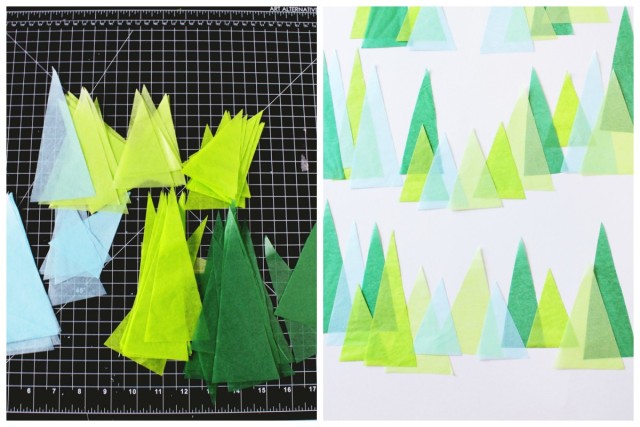
Step 4: Buy or cut a piece of thick watercolor paper to match the size of your photo frame. My paper was 138 lbs for reference. It should be watercolor paper because it’s made to absorb moisture without buckling (getting wrinkly and creased).
Step 5: Lay out your shapes in a pattern you like. I played around with different styles and layouts before I found one I really liked.
Step 6: In a jar, mix water and white glue in a 50/50 mixture.
Step 7: Spread a thin layer of glue on your big paper where the tree will go. Place the tissue paper down and continue doing this for each tree.
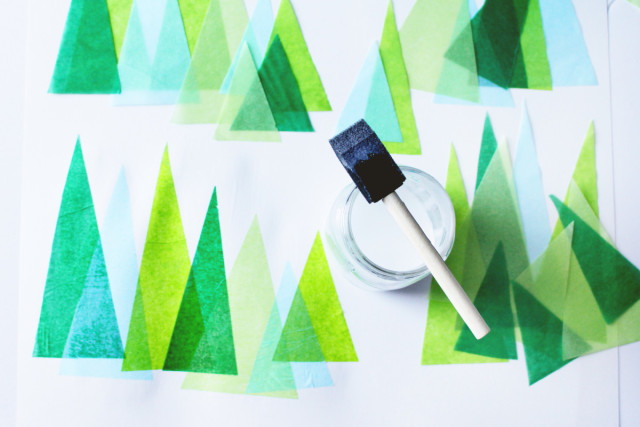
Step 8: Use thin layers of glue to get the trees down. Then, go over any spots that aren’t sticking down by brushing glue on top. Brush glue on top of a few overlapping pieces for a more translucent look.
Step 9: Wait for it to dry, maybe with a little help from a blow dryer. Frame and you’re done!