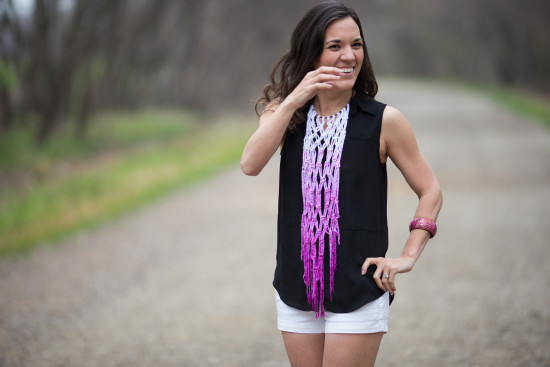
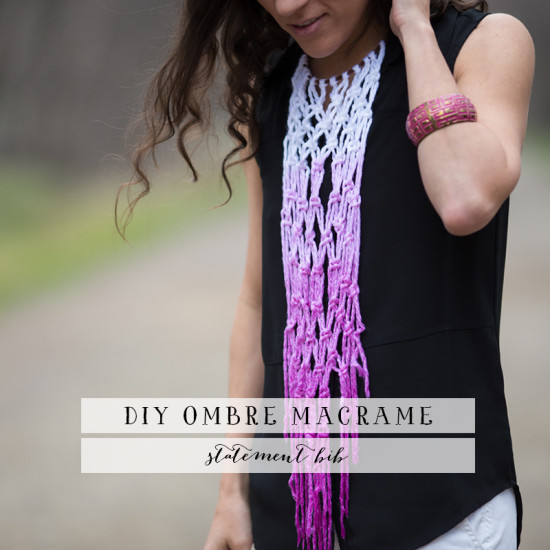
With Easter approaching (now a few months ago!), the department stores were filled with all the new, bright spring dresses…but I was on the hunt for something that fit “me” a little better for the occasion. I tend to be very simple with my clothing, so accessories are really my time to shine. And these past few years I have tried to make a point to incorporate something handmade/recycled/local/all-of-the-above into my daily life and wardrobe. So between my love for macrame, the ongoing ombre trend and the warm Texas weather in March, a light and fun statement bib was the perfect piece to top off my brunch outfit! This can be paired with a maxi dress, strapless romper or casual tank as pictured – so versatile and always a conversation starter. And I chose to use only the two simplest macrame knots, so even a beginner can knock this one out of the park! Promise! But you can also make the design all your own with any knot combination you can imagine. One of my favorite things about this piece is that it gives you that scarf vibe but can be worn in any weather and during any season without overheating! But hands down the best part of this project is that you can feature one of your very own works of art anywhere you go! Happy knotting!
Materials
- Leather Lace
- White yarn or Macrame Cord (thickness and texture of your choice)
- Rit Liquid Dye
- Scissors
- Tape
- Large Pot/Stove
How to make it
Step 1: Start by taping a 24-inch piece of leather lace to your work surface. Next, cut 12 pieces of yarn, each approximately 5 feet long. Secure these twelve pieces to your leather lace using larks head knots approximately 1 cm apart.
Step 2: Now you’re ready to begin your statement bib!
Note: From here on out, each strand of your piece will be referred to by a number, 1 through 24, going from left to right. Take extra care to keep your strands separated and untangled so you know which strand is which number.
For your first row, tie a square knot (see square knot short video above) using strands (1-4), (5-8), (9-12), (13-16), (17-20) and (21-24).
Step 3: Don’t pull the knots too tight, as this will take away from some of the texture and feel of the piece.
Next, tie square knots in (3-6), (7-10), (11-14), (15-18) and (19-22).
Tie square knots in (1-4), (5-8), (9-12), (13-16), (17-20) and (21-24).
Tie square knots in (3-6), (7-10), (11-14), (15-18) and (19-22).
Tie another row of square knots in (3-6), (7-10), (11-14), (15-18) and (19-22). Make sure to leave about one vertical inch between your previous knots.
Tie square knots in (1-4), (5-8), (9-12), (13-16), (17-20) and (21-24).
Tie square knots in (3-6), (7-10), (11-14), (15-18) and (19-22).
Tie another row of square knots in (3-6), (7-10), (11-14), (15-18) and (19-22). Make sure to leave about one vertical inch between your previous knots.
Tie square knots in (1-4), (5-8), (9-12), (13-16), (17-20) and (21-24).
Tie square knots in (3-6), (7-10), (11-14), (15-18) and (19-22).
Tie square knots in (5-8), (9-12), (13-16) and (17-20).
Tie square knots in (9-12) and (13-16).
Tie one final square knot using the center four strands (11-14).
Trim the remaining yarn into a graduated “v.”
Step 4: Now you’re ready to dye your piece!
Note: Make sure to select the appropriate dye for your yarn. Because my yarn was 80% polyester, I chose Rit’s synthetic dye in super pink. Follow the dye’s stovetop instructions. Because some yarns can be fragile, try to leave your piece in the liquid for the least amount of time possible to prevent fraying and damage.
Following the dye’s instructions, heat your water on the stovetop. Add 3-5 drops of dye, then stir and submerge your piece up to the point you want the color to start. After 5-10 seconds, pull 5 inches of that piece out of the dye. Add 5-10 more drops of dye and stir while the yarn soaks. Wait 30-60 seconds and pull the piece up again, this time leaving only 4-6 inches in the dye. Add 10-20 final drops of dye, stir again and let soak for another 2-3 minutes or until you’ve reached your desired color.
Remove the piece from the dye completely, and let it hang to dry over a towel or stainless sink. Gently separate the bottom fringes. Avoid wringing or patting dry, as this can permanently change the shape of your fringe. I let mine dry overnight, and it was perfect the next morning.
Now show that baby off!