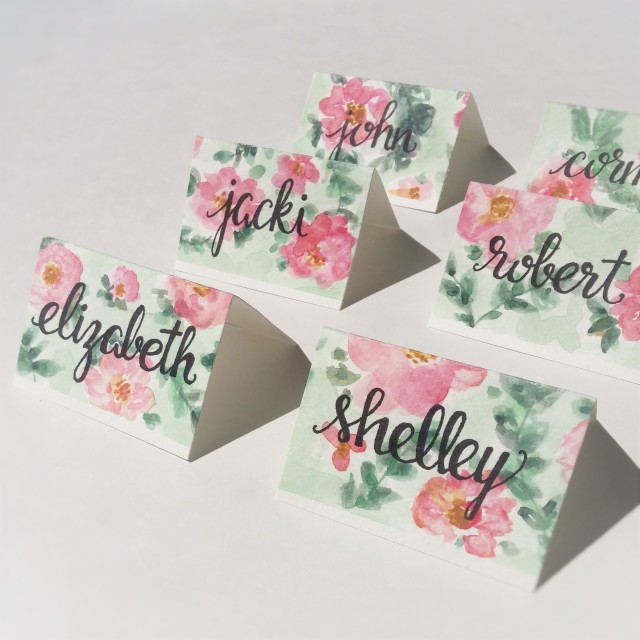
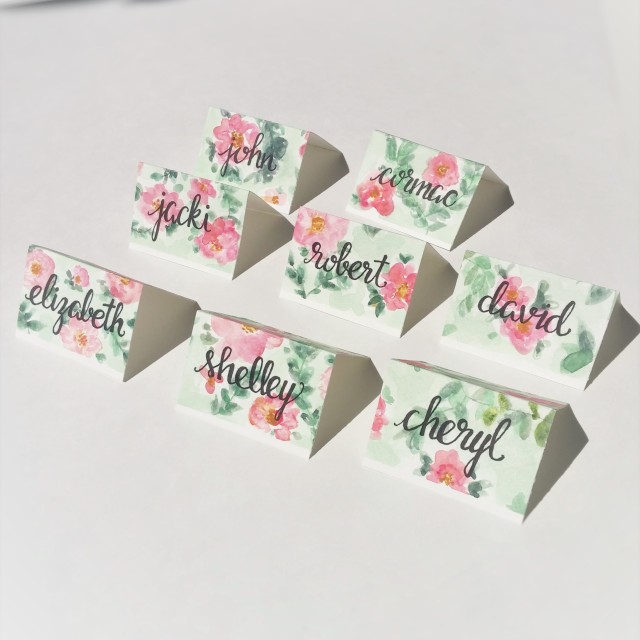
Place cards can save the day; separating Aunt Jill from cousin Thomas at Thanksgiving, keeping Grandma close to the kitchen so she can fuss over the pie in the oven, or even making sure that Christina’s ex-boyfriend (who is now dating Justine – can you believe it?) is seated out of view at the head-table at Christina’s wedding.
Other times they are just charming additions to a table of friends and families. These floral watercolor escort cards are laid back enough for a chill brunch vibe, or can be whimsical enough for a shabby-chic wedding. No painting skills required; just enough patience to trust yourself that once your painting is chopped up, it will look fine. Just make sure that if these beauties are in fact used to keep enemies apart, that you hide them away if a food fight starts.
Materials
- Strathmore watercolour paper
- Pebeo watercolour Palette
- Assorted brushes
- Pentel aquabrush
- Pencil
- Ruler
- Eraser
- Sharpie fine tip Marker
- Paper cutter
How to make it
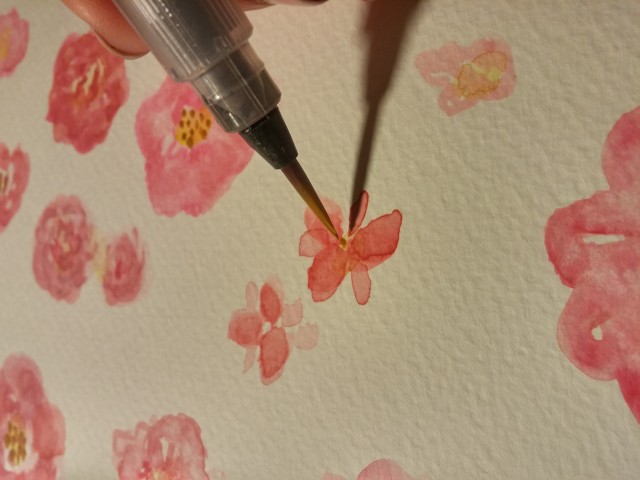
Step 1: Create a very basic, rough floral pattern with watercolor paint. Try to leave some white space between petals. Use a big piece of paper (you will cut it later), and don't worry too much about spacing, consistency or size. Imagine your paper has been divided into a grid of 1 inch squares; try to make sure there is a part of a flower in each square. Embrace the fluidity of the medium and let colours blend together with loose lines. Blot a wet flower with a dry tissue to create texture. Use an ocher yellow to add centers to the flower. I like to do the centers with a bit of a more accurate touch to contrast the soft lines of the petals.
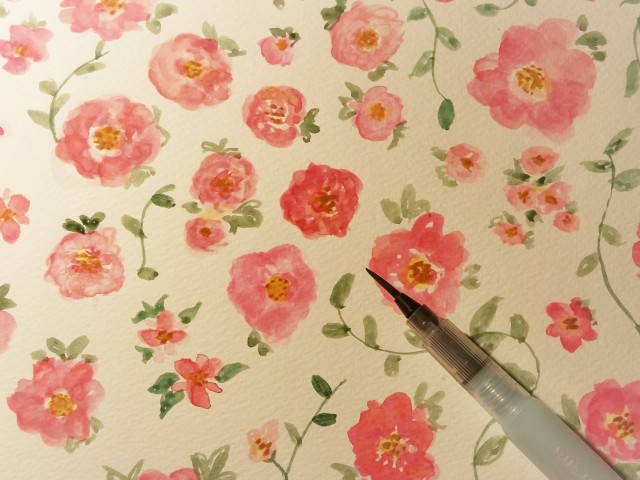
Step 2: Begin adding vines and leaves to the paper. Try to have little green leaves on each flower, and use the space between to fill with vines. Gradually add more leaves, changing colours frequently and blending shades together. To complete the painting, add a wash of light green over the dry leaves and on any remaining white spots.
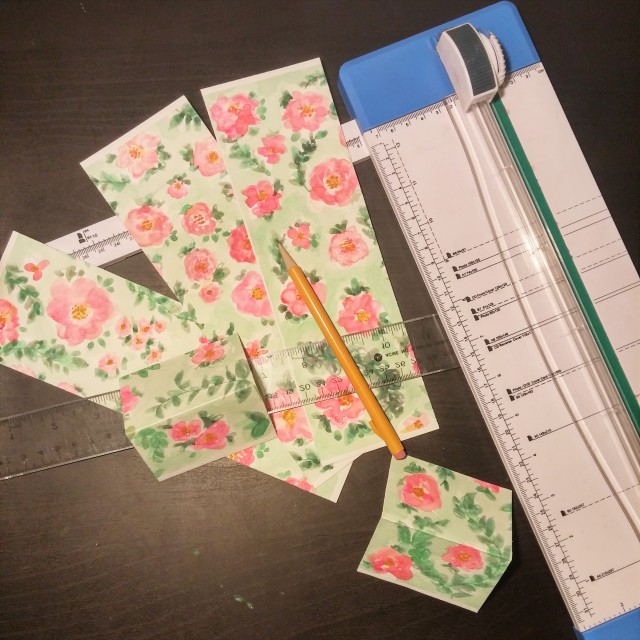
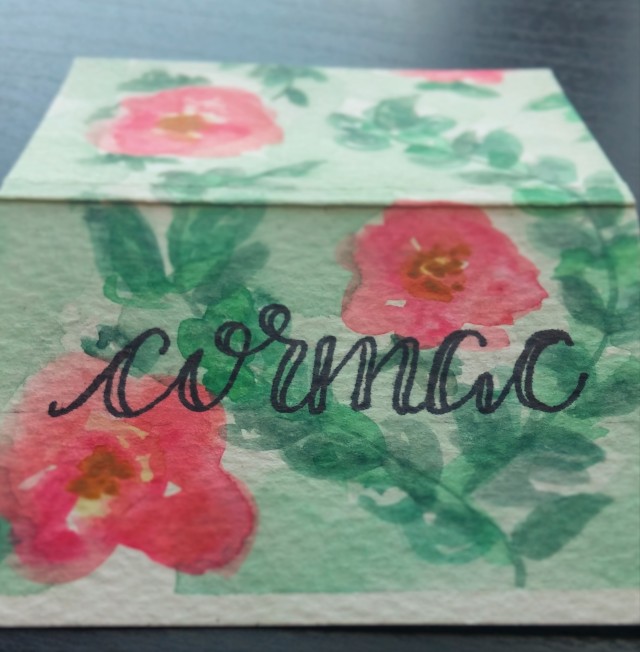
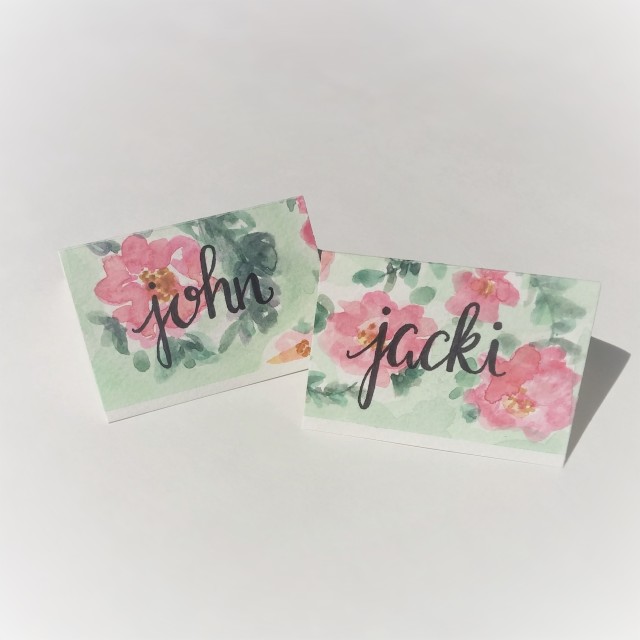
Step 3: Once you have finished painting, cut the paper into 7.5x10cm pieces and fold in half horizontally.
Step 4: Use a pencil to lightly draw a horizontal guideline on the place card. Prepare your card with a pencil sketch of your writing and adjust spacing as needed. Once finalized, trace over the writing with a fine tip Sharpie marker. In order to get a mock-calligraphy feel, thicken the down-strokes. When everything is dry, you can erase your guidelines, set the table and enjoy!
I love these!