
These cards provided a personal touch to thank all my bridal shower guests for attending.
![]()
Materials
- cardstock
- rotary cutter
- brushes
- concentrated paint
How to make it
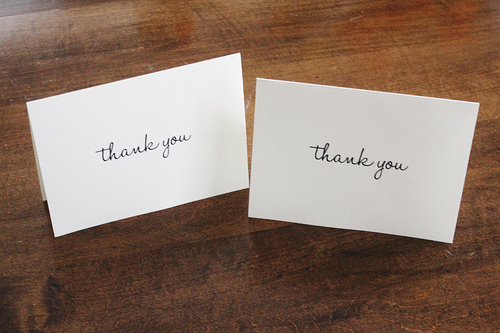
Step 1: To start off, I picked up a package of Avery Textured White Note Cards. They come with 50 sheets of paper that are perforated down the middle of the page, giving you two cards per sheet. There are also envelopes to match the cards once they are cut to size.
Step 2: I used the template from the website to make my cards, adding a “Thank You” message on the front and then my name and the date on the back.

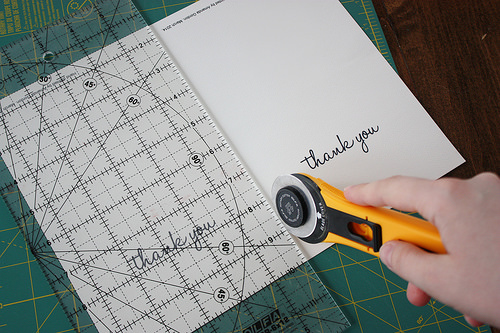
Step 3: Once I had all the cards printed, I used my rotary cutter to cut the edges rather than ripping them along the perforations. I’ve just found that cutting them gives a much cleaner look.
Step 4: One of the big reasons I like using these note card sheets, rather than just buying textured cardstock, is that they come with the creases already there, making folding them in half that much easier.
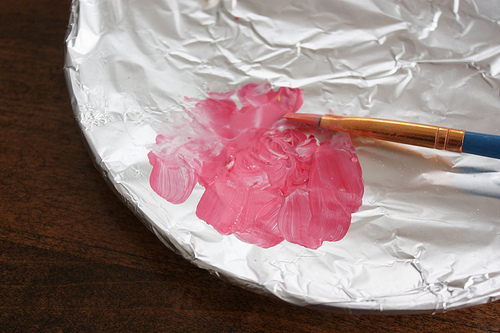
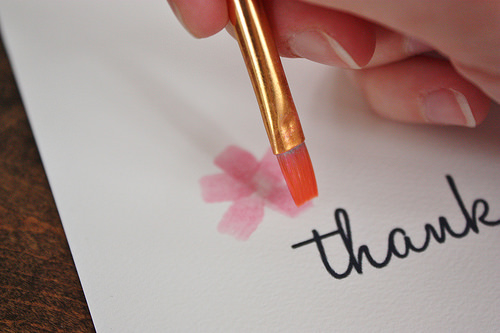
Step 5: With watercolours, you can buy the paint in two ways – hard palette blocks or in tubes of concentrated paint. I have the tubes and tend to mix them on my makeshift pallette – a small dessert plate covered in tin foil. Easy cleanup! To make the soft pink, I mixed some red paint with white and then used a brush dipped in water to get my desired hue saturation. Have a test sheet of paper to play with the designs and colours before you start on the cards.
Step 6: Before I get into what I did, I want to share with you what didn’t work. When I was originally planning to do these cards, I wanted to have blended look with watercolour filling most of the page. After several attempts, I quickly found that the cardstock just didn’t do well with watercolour. It quickly became warped and didn’t allow the colours to move as much as I liked. If I was to attempt that type of design again, I would buy watercolour paper and use that to make the cards.
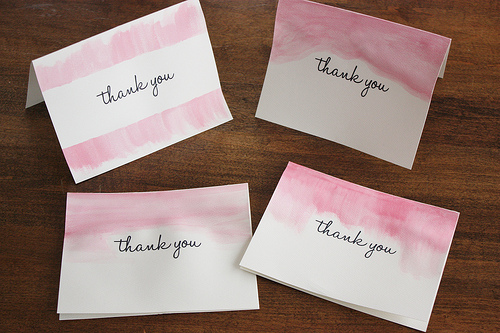
Step 7: Instead, I went with a simple pink flower design. Using a square shaped brush, I made the petals by brushing each stroke into the center.
Step 8: Using yellow paint and a fine tipped brush, I added some dots to the centre of each flower.
